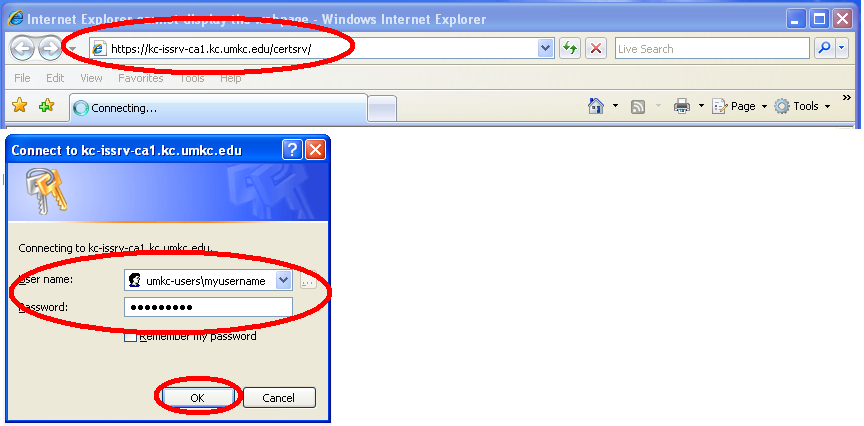
Open Internet Explorer then go to the website: https://kc-issrv-ca1.kc.umkc.edu/certsrv. You will be asked to logon immediately. Use your SSO username and password in the form: umkc-users\myusername.
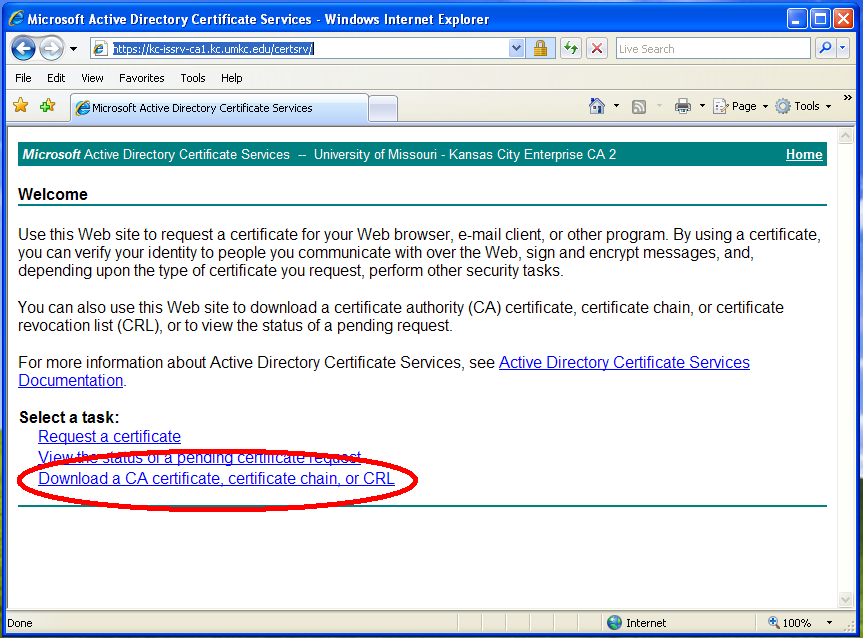
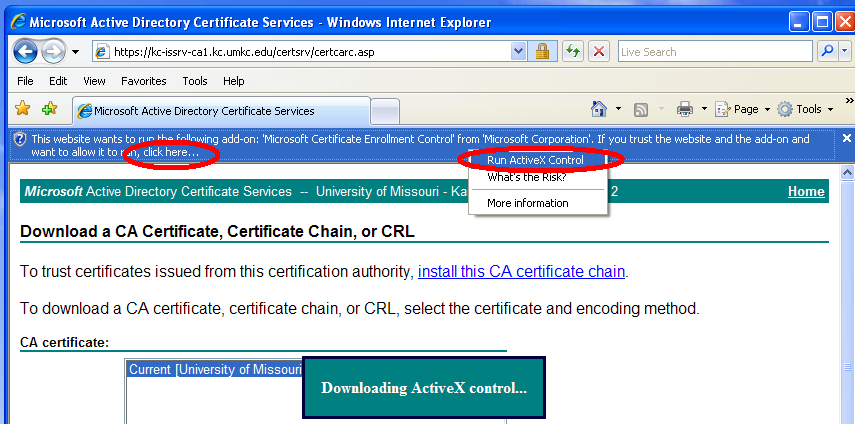
The next webpage should like like the page below. Click on "Download a CA certificate, certificate chain, or CRL".
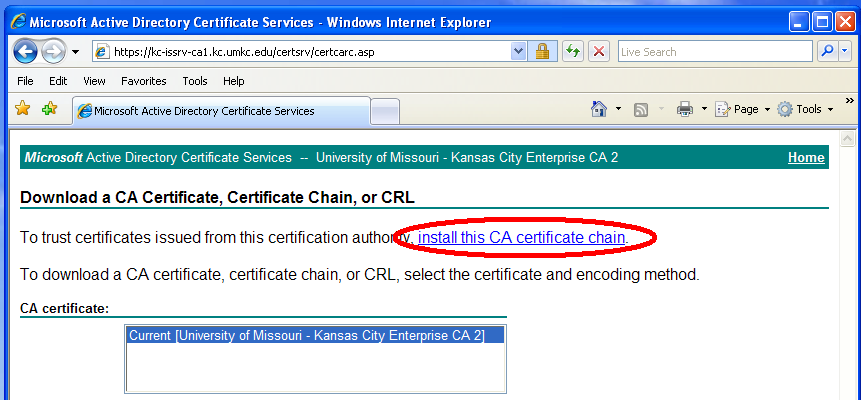
Click on "install this CA certificate chain".
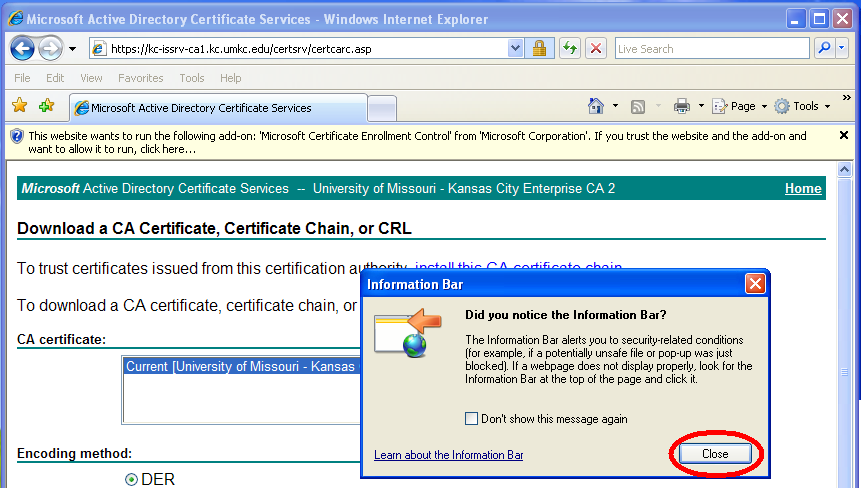
If you see the Information Bar dialog box, click the <Close> button.
You will see the following page. Click on the security banner then click "Run ActiveX Control".
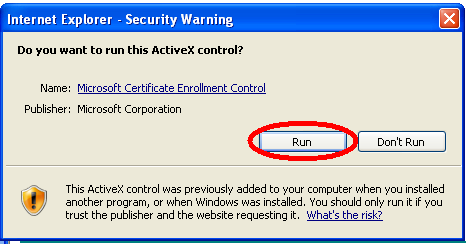
When the "Internet Explorer - Security Warning" dialog box appears select the <Run> button.
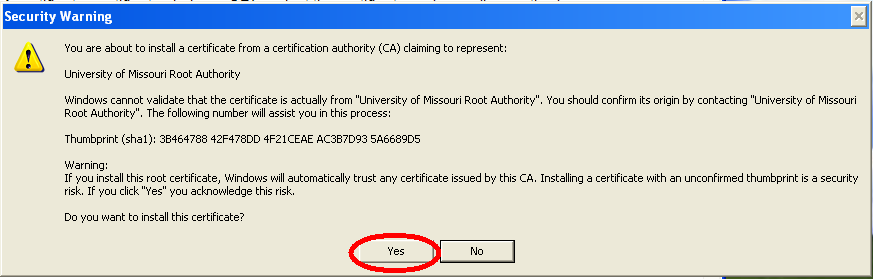
If you see the following dialog box, click <Yes>.

A second Security Warning will appear, click <Yes>.
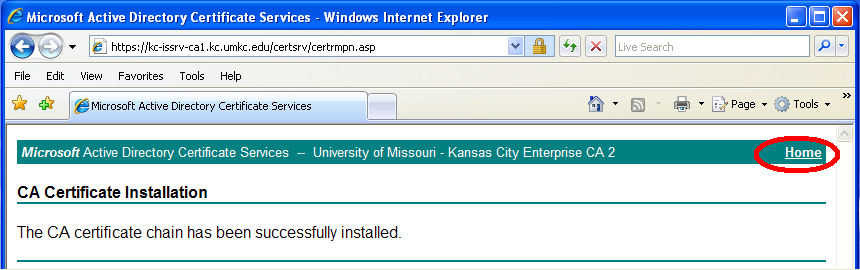
When this page appears click on the "Home" link.
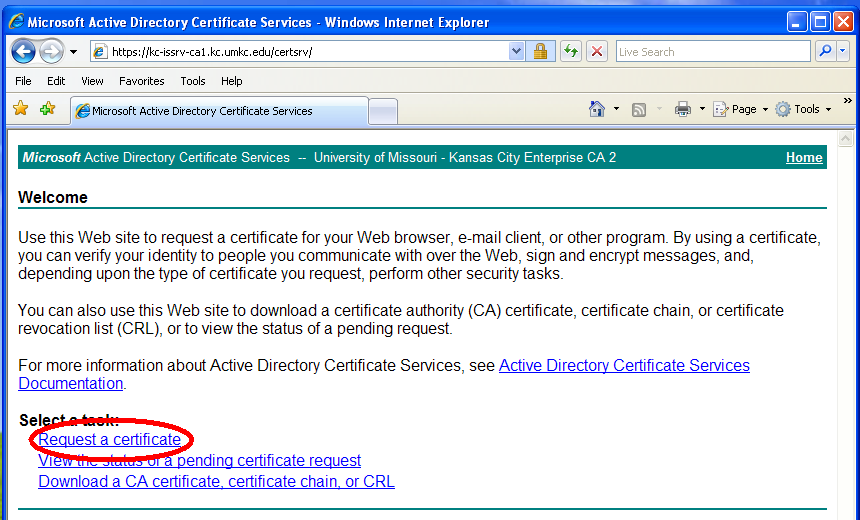
You will return to the "Microsoft Active Directory Certificate Services" webpage. Select "Request a certificate".
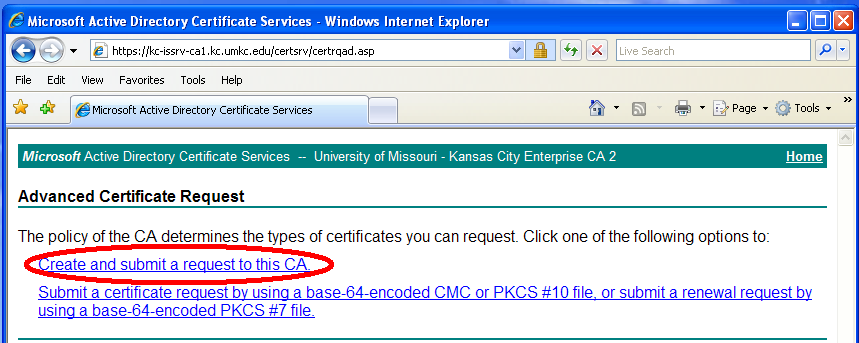
Select "Create and submit a request to this CA" on the "Advanced Certificate Request" webpage.
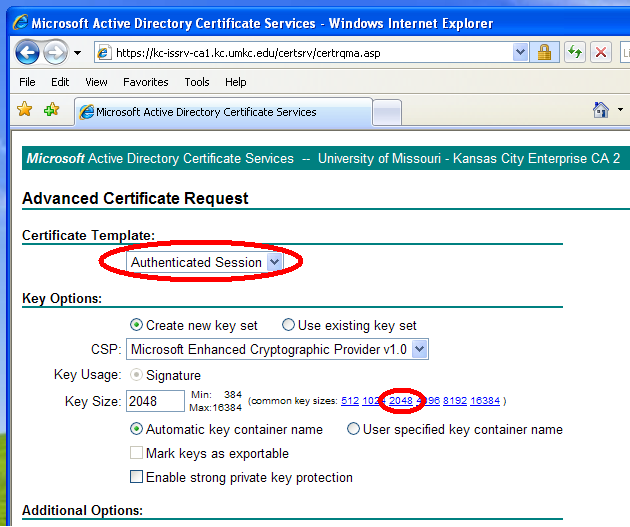
You will make the following changes on the webform shown below: (1) Select "Authenicated Session" for Certificate Template. (2) Select "Microsoft Enhanced Cryptographic Provider v1.0" for CSP. (3) Select "2048" for the Key Size. Then click on <Submit>.
You will see the following dialog box, click <Yes>.

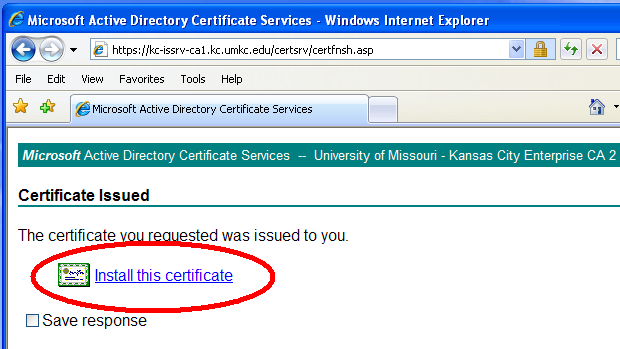
The Certificate Issued webpage appears then click on "Install this certificate".
When you see the next dialog box, select <Yes>.

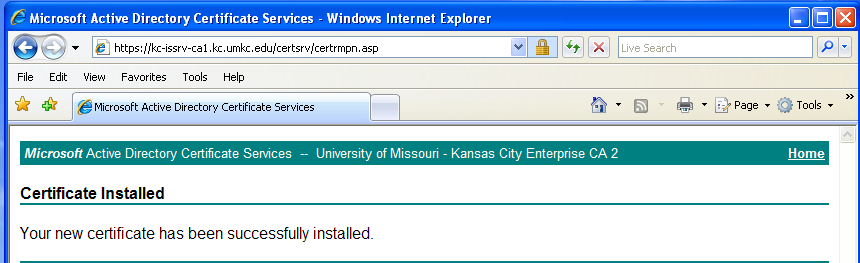
The appearance of this webpage indicates that you have successfully installed the new certificate.
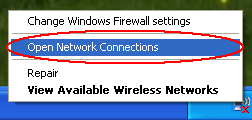
Right click on the Network icon in the lower right corner of the TaskBar. Select "Open Network Connections" from the menu.
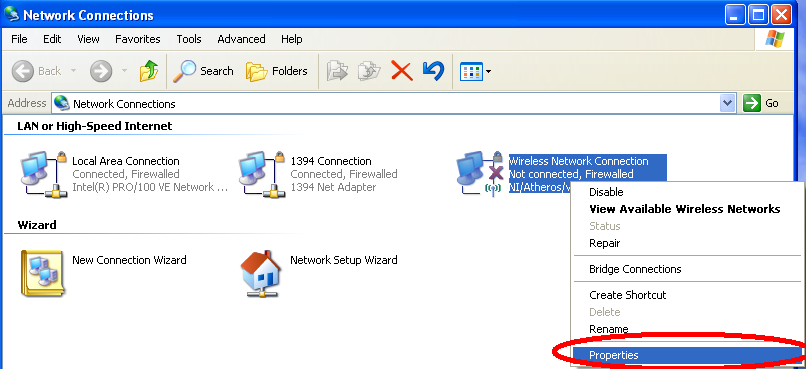
When you see the following window, right click on the Wireless Network Connections icon. Select "Properties" from the menu.
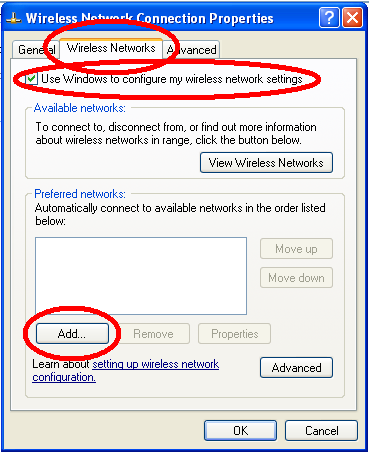
The Wireless Network Connection Properties dialog box will appear. Click on the "Wireless Networks" tab. Make sure the "Use Windows to configure my wireless settings box is checked. Remove all UMKC related networks from the Preferred Networks section. Click on the <Add> button.
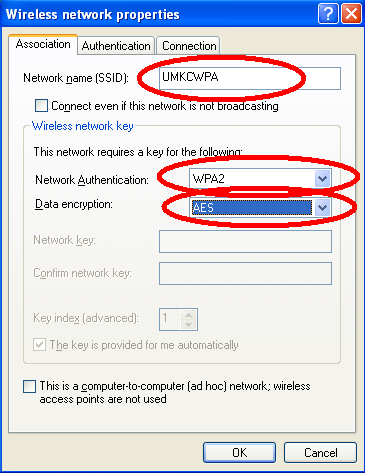
Select the Association tab on the Wireless network properties dialog box. (1) Enter "UMKCWPA" in the Network name box. (2) Select "WPA2" for the Network Authentication. (3) Select "AES" for the Data Encryption. Click <OK>. Note: If WPA2 is not available for step 1, please upgrade your computer to Windows XP SP3 and install the latest version of your network adapter drivers.
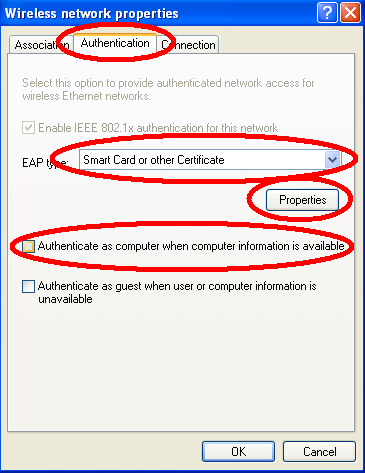
Select the Authentication tab. (1) Choose "Smart Card or other Certificate" for the EAP Type. (2) Make the "Authenticate as computer when computer information is available" radio button is not checked. (3) Click on the "Properties" button.
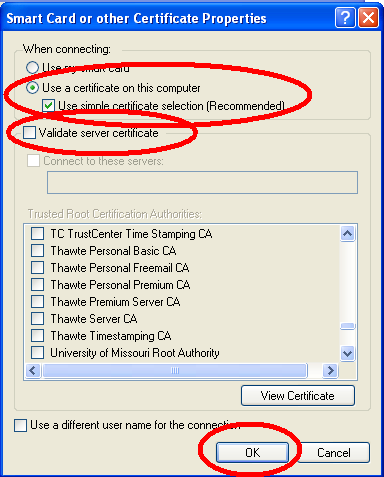
The Smart Card or other Certificate Properties dialog box appears next. (1) Select "Use a certificate on this computer" and check "Use simple certificate selection". (2) Make sure the "Validate server certificate" button is not checked. Click <OK>.
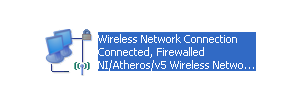
You have completed the configuration of the network properties. The Network Connections dialog box will reappear. The Wireless Network Connection icon should look like the following image.
You are now ready to use the wireless network at UMKC.