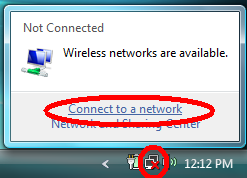
First, locate the 'Network' icon in the lower-right-hand corner of your screen. This will look like the following:
![]()
Click on the network icon, and a window will pop-up. Click on the option for 'Connect to a network' as shown below:
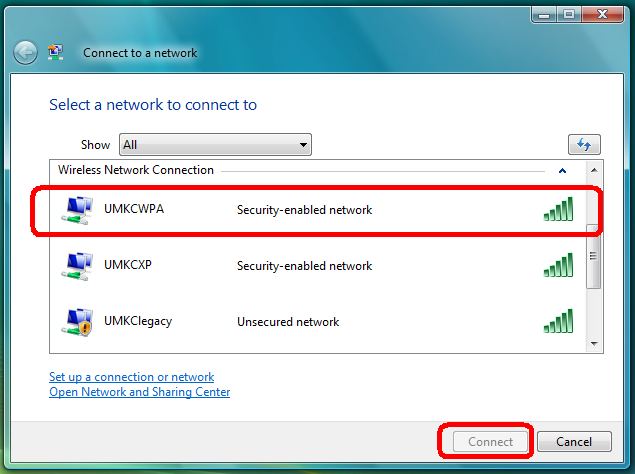
Next you will be given a list of networks to connect to. Select the network 'UMKCWPA' as shown below:
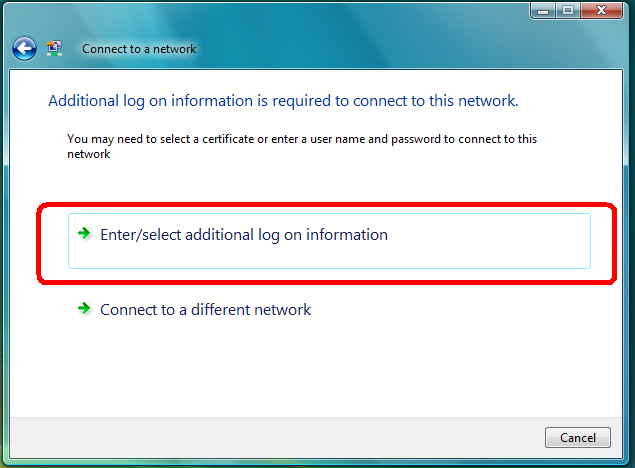
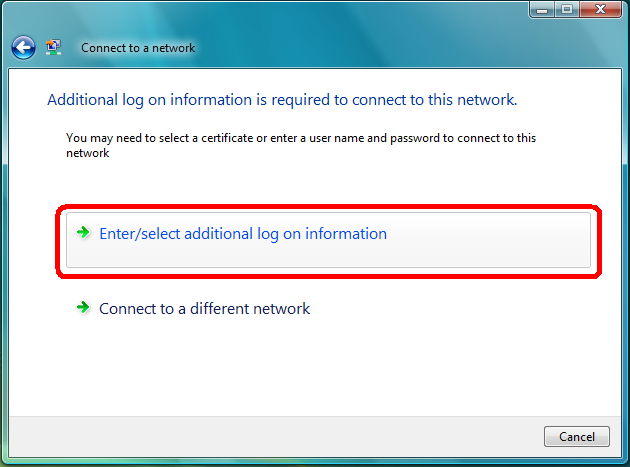
Next you will be prompted for how to logon. Select the option to enter your log on information as shown below:
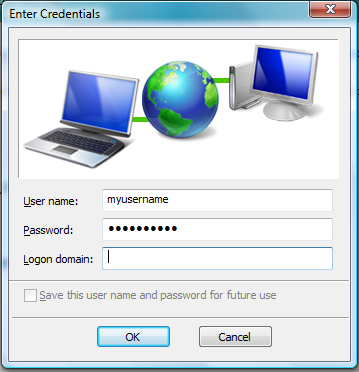
Next you will be prompted to enter your username and password. Enter your UMKC username, and your password. This will be the same username you use for email and other services at UMKC.
After entering your username information once, you will again be prompted about how to logon. Once again click to enter your log on information as shown below:
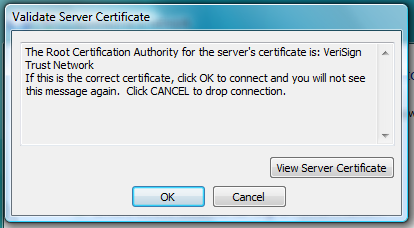
This time you will be prompted to accept the encryption certificate used at UMKC for logons. Click OK to logon. This window will look like the following:
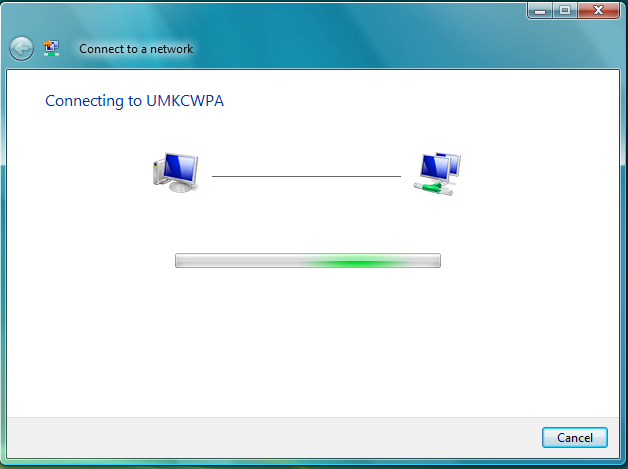
After accepting the certificate, you will get the 'Connecting' window as shown below:
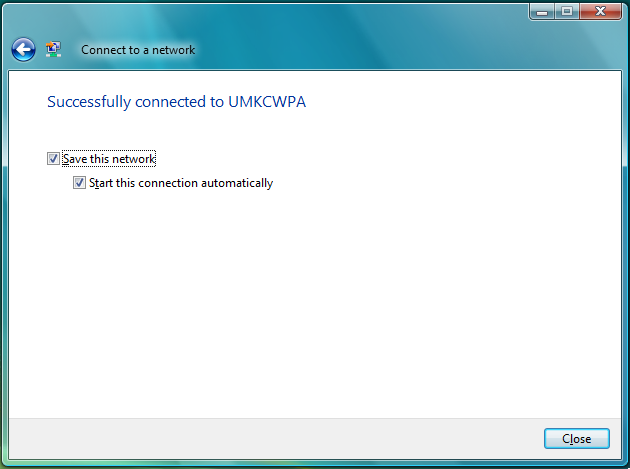
Once connected, you will be given a chance to save your wireless settings. Select to save the settings, and to connect automatically, as shown below. This will let your computer connect automatically in the future without having to manually enter the information above.
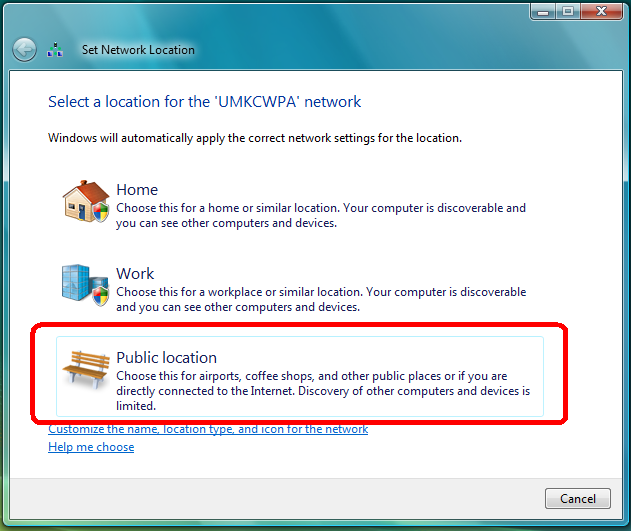
After you save your connection information, Vista will want to know what type of network this is. Tell your computer that this is a 'Public location' as you will still want your computer to protect itself from other computers on campus. This will look like the following:
You can now use your wireless encrypted connection to the UMKC network.
If you have any windows left open, such as 'Sharing Center' or others, simply close these windows.